Four Rigol oscilloscope hacks with Python

A Rigol oscilloscope has a USB output, allowing you to control it with a computer and and perform additional processing externally. I was inspired by Cibo Mahto's article Controlling a Rigol oscilloscope using Linux and Python, and came up with some new Python oscilloscope hacks: super-zoomable graphs, generating a spectrogram, analyzing an IR signal, and dumping an oscilloscope trace as a WAV file. The key techniques I illustrate are connecting to the oscilloscope with Windows, accessing a megabyte of data with Long Memory, and performing analysis on the data.

Analyzing the IR signal from a TV remote using an IR sensor and a Rigol DS1052E oscilloscope.

Analyzing the IR signal from a TV remote using an IR sensor and a Rigol DS1052E oscilloscope.

Super-zoomable graphs

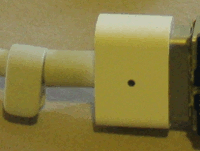
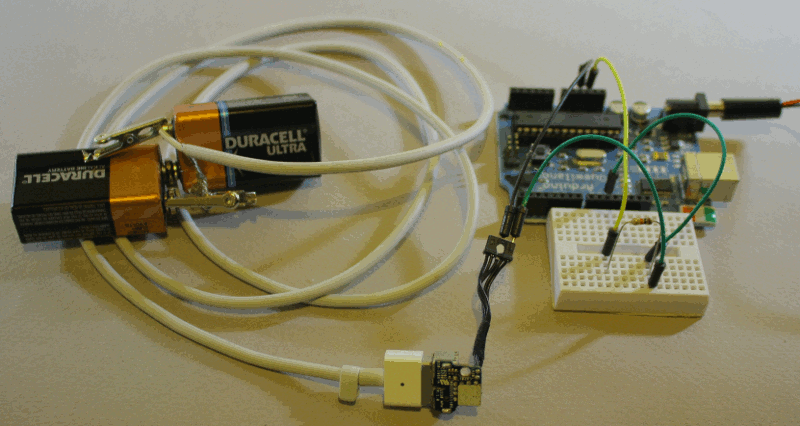
One of the nice features of the Rigol is "Long Memory" - instead of downloading the 600-point trace that appears on the screen, you can record and access a high-resolution trace of 1 million points. In this hack, I show how you can display this data with Python, giving you a picture that you can easily zoom into with the mouse.

The following screenshot shows the data collected by hooking the oscilloscope up to an IR sensor. In the above picture, the sensor is the three-pin device below the screen. Since I've developed an IR library for Arduino, my examples focus on IR, but any sort of signal could be used. By enabling Long Memory, we can download not just the data on the screen, but 1 million data points, allowing us to zoom way, way in. The graph below shows what it sent when you press a button on the TV remote - the selected button transmits a code, followed by a periodic repeat signal as long as the button is held down.

The IR signal from a TV remote. The first block is the code, followed by period repeat signals while the button is held down.

The IR signal from a TV remote. The first block is the code, followed by period repeat signals while the button is held down.
But with Long Memory, we can interactively zoom way on the waveform and see the actual structure of the code - long header pulses followed by a sequence of wide and narrow pulses that indicate the particular button. That's not the end of the zooming - we can zoom way in on an edge of a pulse and see the actual rise time of the signal over a few microseconds. You can do some pretty nice zooming when you have a million datapoints to plot.

Zooming in on the first part of the waveform shows the structure of the code - long header pulses followed by wide and narrow pulses. Zooming way, way in on the edge of a pulse shows the rise time of the signal.

To use this script, first enable Long Memory by going to Acquire: MemDepth. Next, set the trigger sweep to Single. Capture the desired waveform on the oscilloscope. Then run the Python script to upload the data to your computer, which will display a plot using matplotlib. To zoom, click the "+" icon at the bottom of the screen. This lets you pan back and forth through the data by holding down the left mouse button. You can zoom in and out by holding the right mouse button down and moving the mouse right or left. The magnifying glass icon lets you select a zoom rectangle with the mouse. You can zoom on your oscilloscope too, of course, but using a mouse and having labeled axes can be much more convenient.

A few things to notice about the code. The first few lines get the list of instruments connected to VISA and open the USB instrument (i.e. your oscilloscope). The timeout and chunk size need to be increased from the defaults to download the large amount of data without timeouts.

Next, ask_for_values gets various scale values from the oscilloscope so the axes can be labeled properly. By setting the mode to RAW we download the full dataset, not just what is visible on the screen. We get the raw data from channel 1 with :WAV:DATA? CHAN1. The first 10 bytes are a header and should be discarded. Next, the raw bytes are converted to numeric values with Mahto's formulas. Finally, matplotlib plots the data.

There are a couple "gotchas" with Long Memory. First, it only works reliably if you capture a single trace by setting the trigger sweep to "single". Second, downloading all this data over USB takes 10 seconds or so, which can be inconveniently slow.

Analyze an IR signal

Once we can download a signal from the oscilloscope, we can do more than just plot it - we can process and analyze it. In this hack, I decode the IR signal and print the corresponding hex value. Since it takes 10 seconds to download the signal, this isn't a practical way of using an IR remote for control. The point is to illustrate how you can perform logic analysis on the oscilloscope trace by using Python.

This code shows how the Python script can wait for the oscilloscope to be triggered and enter the STOP state. It also shows how you can use Python to initialize the oscilloscope to a desired configuration. The oscilloscope gets confused if you send too many commands at once, so I put a short delay between the commands.

Generate a spectrogram

Another experiment I did was using Python libraries to generate a spectrogram of a signal recorded by the oscilloscope. I simply hooked a microphone to the oscilloscope, spoke a few words, and used the script below to analyze the signal. The spectrogram shows low frequencies at the bottom, high frequencies at the top, and time progresses left to right. This is basically a FFT swept through time.

A spectrogram generated by matplotlib using data from a Rigol DS1052E oscilloscope.

A spectrogram generated by matplotlib using data from a Rigol DS1052E oscilloscope.
To use this script, set up the oscilloscope for Long Memory as before, record the signal, and then run the script.

Dump data to a .wav file

You might want to analyze the oscilloscope trace with other tools, such as Audacity. By dumping the oscilloscope data into a WAV file, it can easily be read into other software. Or you can play the data and hear how it sounds.

To use this script, enable Long Memory as described above, capture the signal, and run the script. A file channel1.wav will be created.

How to install the necessary libraries

Before connecting your oscilloscope to your Windows computer, there are several software packages you'll need.
  • I assume you have Python already installed - I'm using 2.7.3.
  • Install NI-VISA Run-Time Engine 5.2. This is National Instruments Virtual Instrument Software Architecture, providing an interface to hardware test equipment.
  • Install PyVISA, the Python interface to VISA.
  • If you want to run the graphical programs, install Numpy and matplotlib.
You can also use Rigol's UltraScope for DS1000E software, but the included NI_VISA 4.3 software doesn't work with pyVisa - I ended up with VI_WARN_CONFIG_NLOADED errors. If you've already installed Ultrascope, you'll probably need to uninstall and reinstall NI_VISA.

If you're using Linux instead of Windows, see Mehta's article.

How to control and program the oscilloscope

Once the software is installed (below), connect the oscilloscope to the computer's USB port. Use the USB port on the back of the oscilloscope, not the flash drive port on the front panel.

Hopefully the code examples above are clear. First, the Python program must get the list of connected instruments from pyVisa and open the USB instrument, which will have a name like USB0::0x1AB1::0x0588::DS1ED141904883. Once the oscilloscope connection is open, you can use scope.write() to send a command to the oscilloscope, scope.ask() to send a command and read a result string, and scope.ask_for_values() to send a command and read a float back from the oscilloscope.

When the oscilloscope is under computer control, the screen shows Rmt and the front panel is non-responsive. The "Force" button will restore local control. Software can release the oscilloscope by sending the corresponding ":KEY:FORCE" command.

Error handling in pyVisa is minimal. If you send a bad command, it will hang and eventually timeout with VisaIOError: VI_ERROR_TMO: Timeout expired before operation completed.

The API to the oscilloscope is specified in the DS1000D/E Programming Guide. If you do any Rigol hacking, you'll definitely want to read this. Make sure you use the right programming guide for your oscilloscope model - other models have slightly different commands that seem plausible, but they will timeout if you try them.

Conclusions

Connecting an oscilloscope to a computer opens up many opportunities for processing the measurement data, and Python is a convenient language to do this. The Long Memory mode is especially useful, since it provides extremely detailed data samples.

Reverse-engineering the flag circuits in the 8085 processor

Processors all have status flags to keep track of conditions such as a zero value, a carry, or a negative value. Whenever you write a loop or conditional, these flags ultimately are in control. But how are these flags implemented in the chip's silicon? I've reverse-engineered the flag circuits in the 8085 microprocessor and explain what is really going on.

The photograph below is a highly magnified image of the 8085's silicon, showing the relevant parts of the chip. In the upper-left, the arithmetic logic unit (ALU) performs 8-bit arithmetic operations. The status flag circuitry is below the ALU and the flags are connected to the data bus (indicated in blue). To the right of the ALU, the control PLA decodes the instructions into control lines that control the operations of the ALU and flag circuits.

Photograph of the 8085 chip showing the location of the ALU, flags, and registers.

The 8085 has seven status flags.
  • Bit 7 is the sign flag, indicating a negative two's-complement value, which is simply a byte with the top bit set.
  • Bit 6 is the zero flag, indicating a value that is all zeros.
  • Bit 5 is the undocumented K (or X5) flag, indicating either a carry from the 16-bit incrementer/decrementer or the result of a signed comparison. See my article on the undocumented K and V flags.
  • Bit 4 is the auxiliary carry, indicating a carry out of the 4 low-order bits. This is typically used for BCD (binary-coded decimal) arithmetic.
  • Bit 3 is unused and set to 0. Interestingly, a fairly large transistor drives the data bus line to 0 when reading the flags, so this unused flag bit doesn't come for free.
  • Bit 2 is the parity flag, which is set if the result has an even number of 1 bits.
  • Bit 1 is the undocumented signed overflow flag V (details).
  • Bit 0 is the carry flag.

The image below zooms in on the flag silicon, showing individual transistors. The large transistors labeled with the flag name drive the flag value onto the data bus. From the data bus, the flag values control the results of conditional jumps, calls, and returns. The complex circuits above these transistors compute and store the flag values.

The silicon that implements the flags in the 8085 microprocessor.

The schematic below shows the flag circuit that is implemented in the silicon above.

Schematic of the flag storage in the 8085 microprocessor.

Schematic of the flag storage in the 8085 microprocessor.

Each flag bit has a latch and control lines to write a value to the latch. Most flags are updated by the same arithmetic instructions and controlled by the arith_to_flags control line. The carry flag is affected by additional instructions and has its own control line. The undocumented K and V flags are updated in different circumstances and have their own control lines.

The bus_to_flags control loads the flags from the data bus for the POP PSW instruction, while the flags_to_bus control sends the flag values over the data bus for the PUSH PSW instruction or for conditional branches.

The circuitry to compute most flag values is straightforward. The sign flag is set based on bit 7 of the result. The auxiliary carry flag is set on the carry out of bit 3. The K and V flags are set based on the top two bits (details). The zero flag is normally set from the alu_zero signal that indicates all bits are zero.

The zero flag has support for multi-byte zero: at each step it can AND the existing zero flag with the current ALU zero value, so the zero flag will be set if both bytes are zero. This is only used for the (undocumented) DSUB 16-bit subtract instruction. Strangely, this circuit is also activated for the 16-bit DAD instructions, but the result is not stored in the flag.

If you look at the chip photograph at the top of the article, the flags are arranged in apparently-random order, not in their bit order as you might expect. Presumably the layout used is more efficient. Also notice that the carry flag C is off to the right of the ALU. Because of the complexity of the carry logic, which will be discussed next, the circuitry wouldn't fit under the ALU with the rest of the flag logic.

The carry logic

The schematic below shows the circuit for the carry flag. The logic for carry is more complex than for the other flags because carry is used in a variety of ways.

Schematic of the carry circuitry in the 8085 microprocessor.

Schematic of the carry circuitry in the 8085 microprocessor.

The value stored in the carry flag

The top part of the circuit computes carry_result, the value stored in the carry flag. This value has several different meanings depending on the instruction:
  • For arithmetic operations, the carry flag is loaded with the value generated by the ALU. That is, alu_carry_7 (the high-order carry from bit 7 of the ALU) is used. (See Inside the ALU of the 8085 microprocessor for details on how this is computed.)
  • For DAA (decimal adjust accumulator), the carry flag is set if the high-order digit is >= 10. This value is alu_hi_ge_10, which is selected by the daa control line.
  • For CMC (complement carry), the carry flag value is complemented. To compute this, the previous carry flag value c_flag is selected by use_carry_flag and complemented by the xor_carry_result control line.
  • For ARHL/RAR/RRC (rotate right operations), bit 0 of the rotated value goes into the carry. In the circuit, reg_act_0 (the low-order bit in the undocumented ACT (accumulator temp) register) is selected by the alu_shift_right control line.
The xor_carry_result control inverts the carry value in a few cases. For subtraction and comparison, it flips the carry bit to be the borrow bit. For STC (set carry), the xor_carry_result control forces the carry to 1. For AND operations, it forces the carry to 0.

Generating the carry input signal

The middle part of the circuit selects the appropriate carry_in value that is supplied to the ALU.
  • The first option is to set the carry in to either 0 or 1, by using carry_in_0 and optionally xor_carry_in. This is used for most instructions.
  • The next option is to use the current carry flag value as an input for additions or subtractions (allowing multi-byte arithmetic). For subtraction, this is inverted to convert borrow to carry; the xor_carry_in control does this.
  • The final option uses the carry latch to temporarily hold the carry for the undocumented LDHI and LDSI instructions. These instructions add a constant to a 16-bit register pair, so they need to add the carry from of the low-order sum to the high-order byte. The carry latch temporarily holds the carry, and this value is selected by the use_latched_carry control line. You might wonder why not just use the normal carry flag; the LDHI and LDSI instructions are designed to leave the carry flag unchanged, so they need somewhere else to temporarily store the carry. The surprising conclusion that Intel deliberately included circuitry in the 8085 specifically to support these undocumented instructions, and then decided not to support these instructions. (In contrast, the 6502's unsupported instructions are just random consequences of unsupported opcodes.)

    Generating the shift_right input signal

    Each bit of the ALU has a shift right input. For most of the bits, the input comes from the bit to the left, but the high-order bit uses different inputs depending on the instruction. The bottom circuit in the schematic below generates the shift right input for the ALU. This circuit has two simple options.
    • Normally the carry flag is fed into shift_right_in. For the ARHL and RAR instructions, this causes the carry flag to go into the high-order bit.
    • For the RRC and RLC instructions (rotate A left/right), the rotate_carry control selects bit 0 as the shift right input.

    Conclusions

    By reverse-engineering the 8085, we can see how the flag circuits in the 8085 actually works at the gate and silicon level. One interesting feature is the circuitry to implement undocumented instructions and flags. Another interesting feature is the complexity of the carry flag compared to the other flags.

    This information is based on the 8085 reverse-engineering done by the visual 6502 team. This team dissolves chips in acid to remove the packaging and then takes many close-up photographs of the die inside. Pavel Zima converted these photographs into mask layer images, generated a transistor net from the layers, and wrote a transistor-level 8085 simulator.

    Footnotes on rotate

    I recommend you skip this section, but there are few confusing things about the rotate logic that I wanted to write down.

    For some reason the rotate operations are named very strangely in the 8080 and 8085. RRC is the "rotate accumulator right" instruction and RAR is the "rotate accumulator right through carry" instruction. Based on the abbreviations, the names seem reversed. The left rotates RLC and RAL are similar. The Z-80 processor has a similar RRC instruction, but calls it "rotate right circular", making the abbreviation slightly less nonsensical.

    Bit 0 of ACT is fed into shift_right_in for both RRC and RLC. However, this input is just ignored for RLC since the rotation is the other direction, so I assume this is just a result of the control logic treating RRC and RLC the same.)

    To reduce the control circuitry, the rotate_carry and use_latched_carry control lines are actually the same control line since the instructions that use them don't conflict. In other words, there is just one control line, but it has two distinct functions.

  • Twelve tips for using the Rigol DS1052E Oscilloscope

    In this article I share a few tips I've learned about using the Rigol DS1052E oscilloscope.

    The Rigol DS1052E digital oscilloscope.

    The Rigol DS1052E digital oscilloscope.

    Push the knobs

    The knobs all have convenient actions if you push them: pushing Vertical Position or Horizontal Position centers the trace vertically or horizontally. Pushing Tigger Level sets it to zero. Pushing Scale sets it to fine adjust mode.

    Long Memory

    If you don't use Long Memory, you're wasting most of the capacity of the oscilloscope. Long Memory stores 64 times as much data, so you can really zoom in on the waveform. To enable Long Memory, push the Acquire menu button, then select MemDepth to set Long Mem. There's additional documentation here.

    The Long Memory depth option of the Rigol DS1052E oscilloscope.

    The Long Memory depth option of the Rigol DS1052E oscilloscope.

    Use zoom

    Once you've recorded a waveform, you can pan across it using the horizontal position knob - the waveform window indicator at the very top of the screen shows where you are. In mid-range settings, however, the pan range is fairly limited (about a factor of 5) compared to how deep you can zoom with the horizontal scale knob (about a factor of 1000 with Long Memory). Note: zoom works best with Single triggering; if you use Auto or Norm triggering and hit Run/Stop, sometimes the detailed data isn't in memory and zoom doesn't show more than is on the display.

    Pushing the horizontal scale knob turns on the cool zoom mode, which lets you see the trace and a zoomed-in version at the same time, letting you zoom and pan.

    The zoom feature of the Rigol DS1052E oscilloscope.

    The zoom feature of the Rigol DS1052E oscilloscope.

    Using the menus

    Most of the menu buttons are in the group of 6 at the top. However, there's also a trigger menu button under the trigger knob and a time base menu under the horizontal position knob. This is in addition to the four vertical menu buttons: CH1, CH2, MATH, and REF. Among other things, the time base menu lets you select X-Y mode.

    The menus hide about 1/6 of the display, so close the menu when you're done: push the round Menu On/Off button or push a menu button a second time.

    Don't press Auto

    The Auto button is right next to the Run/Stop button, so you might think it will set the trigger to Auto Sweep. Instead this button sets the controls to seemingly-random values to aotomatically display your traces. This is good if you're totally lost, but more likely to wipe out the settings you want.

    Screenshots

    Some oscilloscopes make screenshots easy, but the Rigol is more complicated. To take a screenshot on the Rigol, plug a USB drive into the front panel, then hit the Storage menu button, select Bit map under Storage, select External, New File, and Save. This will save NewFile0.bmp to your flash drive. (It's much easier to rename the file on your computer than on the oscilloscope.)

    An alternative is to run the slightly clunky UltraScope software on your computer, which gives you access to the oscilloscope via USB. You can download "UltraScope for DS1000E" from the Rigol Software Applications page; although it has a PDF icon, it's actually a Zip file with the software.

    Built-in help

    If you hold down a button or knob for three seconds, the oscilloscope displays a help screen explaining its action. (I was surprised when I discovered this by accident.)

    The built-in help feature of the Rigol DS1052E oscilloscope is triggered by holding down a button or knob.

    The built-in help feature of the Rigol DS1052E oscilloscope is triggered by holding down a button or knob.

    Triggering

    The three trigger sweep modes are Auto, Normal, and Single. Auto will keep displaying traces until you hit Run/Stop. Normal will display a trace every time the trigger condition is satisfied. Single will display a single trace when triggered and then stop. Auto is the way to see a waveform without worrying about triggering. But if you want a nice, stable waveform, set up the trigger and use Normal. Also make sure you're triggering from the right channel - the oscilloscope likes to default to using Channel 2 as the trigger.

    Controlling the channels

    If you've used an oscilloscope with separate controls for each channel, you may expect the knobs near CH1 to control channel 1, and the knobs near CH2 to control channel 2. Instead, if you hit CH1, the knobs control channel 1's scale and position, while if you hit CH2, Math, or Ref, the same knobs control that channel's scale and position. Make sure you're controlling the trace you think you're controlling.

    Use the colored probe rings

    Maybe this is too obvious to mention, but putting matching colored rings on both ends of the oscilloscope probes lets you easily tell which probe goes with which channel.

    Label oscilloscope probes with colored rings that match the trace colors.

    Label oscilloscope probes with colored rings that match the trace colors.

    Cursors

    The cursors are very handy to measure voltages, times between two points, frequency, etc. (The Measure mode provides lots of automated measurements, but often doesn't measure what you want.) Manual mode lets you position two cursors (either vertical or horizontal), and the positions and difference are displayed. Track lets you position a cursor along the waveform, and a voltage cursor automatically tracks the waveform. Both time and voltage values are displayed. Auto mode is the mode you should use with Measure, in order to see what the measurements mean.

    A tracking cursor puts X-Y lines on the waveform and gives measurements.

    A tracking cursor puts X-Y lines on the waveform and gives measurements.

    Finding the manual

    Search for DS1000E (not DS1052E) to find the user's guide and other documentation.

    Conclusions

    I'm glad I bought the Rigol DS1052E - it performs very well for a low-price ($329) oscilloscope. (If money is no object, there's Agilent's $439,000 Infiniium oscilloscope. :-) I hope you find these tips useful. If you have any additional oscilloscope tips, please leave a comment.

    The Mili universal car/wall USB charger, tested in the lab

    I received a Mili universal USB charger for review from Mobile Fun. This interesting charger has some features that make it my current favorite travel charger. It runs off both wall power and car accessory power. It comes with swappable plugs for Europe, UK, US, or Australia, and runs on 120 or 240 volts. It has two USB outputs - I thought this was pointless until I discovered how useful it is in car trips if two people can charge at the same time. In addition, one of the ports provides 10 watts for charging tablets (when plugged into AC). The charger also lights up - red indicates charging, and green indicates the devices are charged.

    The charger has a few disadvantages. It is a bit expensive with a list price of $49. Measuring about 2 3/4 inches by 2 1/4 inches, it's much larger than Apple's super-compact inch-cube charger - although it has much more functionality. Finally, due to the design, it ends up blocking both outlets when you plug it into the wall.

    In the remainder of this article, I test the performance of the charger both in the car and with AC power. To summarize, the power quality is excellent in the car, but has more noise than the average charger when plugged into the wall.

    The Mili charger with adapters for different countries.

    The Mili charger with adapters for different countries.

    The label shows that when connected to AC, the charger is rated as 2.1A for output 1 and 1A for output 2; that is, it is designed to power an iPad from output 1 and a phone from output 2. When plugged in to a car accessory outlet, it is only rated to provide 1 amp, so charging a tablet will be slower. In the measurements below, I find that the charger's power exceeds these ratings when plugged into the wall, which is good, but provides a bit less than the expected one amp when plugged into a car output, which may make charging slower.

    Label from the Mili charger.

    Label from the Mili charger.

    Apple devices can reject "wrong" chargers with the error "Charging is not supported with this accessory"; Apple uses special proprietary voltages on the USB data pins to distinguish different types of chargers (details). I measured these voltages on the Mili charger and verified that it is configured to appear as an Apple 2A charger on ouput 1, and an Apple 1A charger on output 2.

    Cars: a hostile electrical environment

    You might expect to find 12 volts at your car's accessory outlet, but what comes out can be surprisingly noisy and variable. This voltage will have spikes from the ignition system as well as very large transients due to starting, malfunctions, or jump starting. A car charger must handle this hostile voltage input, and make sure the output to your device is smooth.

    Test setup to measure charger performance in a car.

    Test setup to measure charger performance in a car.
    I measured the voltage in my car to see what happens in a real-world environment using the setup illustrated above. The Mili charger is plugged in just to the left of the gear shift. Above it is the USB interface board, which is connected to the oscilloscope on the dash.

    Car voltage drops and rises when the car is started. Car voltage at idle showing ignition spikes.

    Car voltage drops and rises when the car is started (left). Car voltage at idle showing ignition spikes (right).

    The oscilloscope trace (yellow) on the left shows the large voltage fluctuations when I started the car. At the very left, with the ignition off, the battery provides about 12.5 volts. The starter pulls the voltage down to 8.88 volts until the engine starts. The voltage gradually rises over 6 seconds, settling around 14 volts.

    On the right, zooming in shows that while the car is idling, the accessory output has 1/2 volt spikes every 28 milliseconds, due to the ignition firing. Note the voltage on the left is much noisier with the car running than on battery - the line on the left is thin, and the line on the right is thick.

    Performance of the Mili charger in a car

    The Mili charger has a plug that folds out from the side for use in a car. While this makes the charger larger than a dedicated wall charger, having a charger that works both in the car and with AC is more convenient than I expected, especially when traveling.

    The Mili USB charger with car adapter.

    The Mili USB charger with car adapter.
    I looked at the output of the Mili charger while starting the car, to see if the large voltage fluctuations shown above affected the charger's output. The Mili output remained steady, which is good. I also didn't see any of the ignition spikes in the output from the Mili charger. This indicates that the Mili charger does a good job of filtering out noise from the automotive environment.

    I tested the Mili charger with inputs from 0 to 30 volts. 30 volts may seem excessive, but jump-starts often use 24 volts, and car electrical failures can result in a 120 volt "load dump". Fortunately, the Mili survived 30 volts just fine (unlike some other chargers I'm testing). The image below shows that the Mili generates a stable output voltage (horizontal line) for inputs from 7 volts to 30 volts. This is a good thing, showing that the Mili won't overload your phone even if your car is providing too much voltage. As expected, the Mili can't produce the full output voltage if the input voltage is too low (left side of the graph).

    Output voltage (Y axis) of the Mili charger as the input ranges from 0 to 30 volts (X axis).

    Output voltage (Y axis) of the Mili charger as the input ranges from 0 to 30 volts (X axis).

    The oscilloscope displays below show the output and frequency spectrum with 12V DC input and a 5W load. The power quality is very good - the yellow line is thin and has very few spikes. The high frequency spectrum (orange) shows a spike at the switching frequency, but overall the power quality is among the best of chargers I've looked at.

    High frequency spectrum of the Mili charger with 12V input. Low frequency spectrum of the Mili charger on 12V input.

    High frequency spectrum (left) and Low frequency spectrum (right) of the Mili charger on 12V input.

    Next, I measured the voltage the charger can provide under increasing load (details). The horizontal line shows the voltage drops from about 5 volts to 4.5 volts as the load increases. The vertical line shows the charger maxes out around .9 amps with less than the expected 5 volts. This is slightly less than the rated 1 amp the charger is supposed to provide. Both USB outputs provide the same current when plugged into a car outlet.

    Voltage vs Current for the Mili charger with 12V input.

    Voltage vs Current for the Mili charger with 12V input.

    Charger performance with wall input

    I also examined the performance of the Mili charger when plugged into the wall (120V AC). One minor annoyance with using the Mili as a wall charger is that due to the position of the USB ports, both wall outlets are blocked either by the charger or USB cables.

    The Mili charger.

    The Mili charger.

    The images below show the voltage the charger can provide under increasing load (details). When plugged into the wall, the two USB outputs provide different maximum currents, unlike when plugged into a car outlet. Output 1 (the high current output) is on the left, and output 2 (the low current output) is on the right. Output 1 reaches about 2.45A before the voltage starts dropping, well above the 2.1A rating. The line for output 1 gets fairly wide above 1A, showing the voltage is not too stable. The line also slopes downwards to the right, indicating the voltage drops somewhat as the load increases. Output 2 reaches about 1.1A before the light starts flashing and the power drops and climbs (the curved lines). This graph shows strange behavior under overload that I haven't seen in other chargers. The lines are all fairly wide, showing the voltage is

    Voltage vs current for the Mili charger (output 1) with 120V AC input. Voltage vs current for the Mili charger (output 2) with 120V AC input.

    Voltage vs current for the Mili charger (output 1 left, output 2 right) with 120V AC input.
    I looked at the voltage output along with the high frequency and low frequency spectrums (below), to examine the quality of the power outputs. The yellow line is much wider than when plugged into the car outlet, showing a lot more noise in the output. The large orange spike in the middle of the high frequency spectrum shows that a lot of the charger's switching noise is appearing on the output. Compared to other chargers, the power quality is lower than average. On the positive side, the flat low-frequency spectrum shows the charger is very good at eliminating ripple due to the 60 Hz power lines.

    High frequency spectrum of the Mili charger with 120V AC input. Low frequency spectrum of the Mili charger with 120V AC input.

    High frequency (left) and low frequency (right) spectrum of the Mili charger with 120V AC input.

    Conclusions

    The Mili charger is convenient for travel because it has plugs for multiple countries, works as an auto charger, and has dual outputs. The power quality is very good in the car, but not so good with AC power. This charger is my favorite charger now - while I'd like to tear it apart and examine the circuit inside, I like it too much to destroy it. Hopefully if you get one you'll like it too. And if you found this interesting, check out my detailed analysis of a dozen chargers in the lab.

    Thanks to Mili, Mobile Fun, and Mihnea for providing me with the charger and patiently waiting for the review.

    Teardown and exploration of Apple's Magsafe connector

    Have you ever wondered what's inside a Mac's Magsafe connector? What controls the light? How does the Mac know what kind of charger it is? This article looks inside the Magsafe connector and answers those questions.

    The Magsafe connector (introduced by Apple in 2006) is very convenient. It snaps on magnetically and disconnects if you pull on it. In addition it is symmetrical so you don't need to worry about what side is up. A small LED on the connector changes color to indicate the charging status.

    The picture below shows the newer Magsafe 2 connector, which is slimmer. Note how the pins are arranged symmetrically; this allows the connector to be plugged in with either side on top. The charger and computer communicate through the adapter sense pin (also called the charge control pin), which this article will explain in detail below. The two ground pins are slightly longer than the others so they make contact first when you plug in the connector (the same as USB).

    The pins of a Magsafe 2 connector. The pins are arranged symmetrically, so the connector can be plugged in either way.

    The pins of a Magsafe 2 connector. The pins are arranged symmetrically, so the connector can be plugged in either way.

    Magsafe connector teardown

    I had a Magsafe cable that malfunctioned, burning the power pins as you can see in the photo below, so I figured I'd tear it down and see what's inside. The connector below is an older Magsafe; notice the slightly different shape compared to the Magsafe 2 above. Also note that the middle adapter sense pin is much smaller than the pins, unlike the Magsafe 2.

    A Magsafe connector with burnt pins.

    Removing the outer plastic shell reveals a block of soft waxy plastic, maybe polyethylene, that helps diffuse the light from the LEDs and protects the circuit underneath.

    A Magsafe connector with the plastic case removed. In front is the metal holder of the pins. Behind it is the circuit board encased in plastic. The power cable exits from the back.

    Cutting through the soft plastic block reveals a circuit board, protected by a thin clear plastic coating. The charger wires are soldered onto the back of this board. Only two wires - power and ground - go to the charger unit. There is no data communication via the adapter sense pin with the charger unit itself.

    After removing more plastic, the circuit board inside a Magsafe connector is visible. The power cable is soldered onto the board.

    Disassembling the connector shows the spring-loaded "Pogo pins" that form the physical connection to the Mac. The plastic pieces hold the pins in place. The block of metal on the left is not magnetized, but is attracted by the strong magnet in the Mac's connector.

    The spring-loaded 'pogo pins' inside a Magsafe connector.

    The circuit board inside the Magsafe connector is very small, as you can see below. In the middle are two LEDs, orange/red and green. Two identical LEDs are on the other side. The tiny chip on the left is a DS2413 1-Wire Dual Channel Addressable Switch. This chip has two functions. It switches the status LEDs on and off (that's the "dual channel switch" part). It also provides the ID value to the Mac indicating the charger specifications and serial number.

    The circuit board inside a Magsafe connector is very small. There are two LEDs on each side. The chip is a DS2413 1-Wire switch.

    The chip uses the 1-Wire protocol, which is a clever system for connecting low-speed devices through a single wire (plus ground). The 1-Wire system is convenient here since the Mac can communicate with the Magsafe through the single adapter sense pin.

    Understanding the charger's ID code

    You can easily pull up the charger information on a Mac (Go to "About this Mac", "More Info...", "System Report...", "Power"), but much of the information is puzzling. The wattage and serial number make sense, but what about the ID, Revision, and Family? It turns out that these are part of the 1-Wire protocol used by the chip inside the connector.

    Every chip in the 1-Wire family has a unique 64-bit ID that is individually laser-programmed into the chip. In the 1-Wire standard, the 64-bit ID consists of an 8-bit family code identifying the type of 1-Wire device, a 48-bit unique serial number, and an 8-bit non-cryptographic CRC checksum that verifies the ID number is correct. Companies (such as Apple) can customize the ID numbers: the top 12 bits of the serial number are used as a customer ID, the next 12 bits are data specified by the customer, and the remaining 24 bits are the serial number.

    With this information, the Mac's AC charger information now makes sense and the diagram below shows how the 64-bit ID maps onto the charger information. The ID field 100 is the customer ID indicating Apple. The wattage and revision are in the 12 bits of customer data (hex 3C is 60 decimal, indicating 60 watts). The Family code BA is the 1-Wire family code for the DS2413 chip. Thus, much of the AC charger information presented by the Mac is actually low-level information about the 1-Wire chip.

    The 1-Wire chip inside a Magsafe connector has a 64-bit ID code. This ID maps directly onto the charger properties displayed under 'About this Mac'.

    The 1-Wire chip inside a Magsafe connector has a 64-bit ID code. This ID maps directly onto the charger properties displayed under 'About this Mac'.

    There are a few complications as the diagram below shows. Later chargers use the family code 85 for some reason. This doesn't indicate an 85 watt charger. It also doesn't indicate the family of the 1-Wire device, so it may be an arbitrary number. For Magsafe 2 chargers, the customer ID is 7A1 for a 45 watt charger, 921 for a 60 watt charger, and AA1 for an 85 watt charger. It's strange to use separate customer IDs for the different models. Even stranger, for an 85 watt charger the wattage field in the ID contains 60 (3C hex) not 85, even though 85 watts shows up on the info screen. The Revision is also dropped from the info screen for later chargers.

    In a Magsafe 2 connector, the 64-bit ID maps onto the charger properties displayed under 'About this Mac'. For some reason, the 'Customer data' gives a lower wattage.

    In a Magsafe 2 connector, the 64-bit ID maps onto the charger properties displayed under 'About this Mac'. For some reason, the 'Customer data' gives a lower wattage.

    How to read the ID number

    It's very easy to read the ID number from a Magsafe connector using an Arduino board and a single 2K pullup resistor, along with Paul Stoffregen's Arduino 1-Wire library and a simple Arduino program.

    The circuit to access a 1-Wire chip from an Arduino is trivial - just a 2K pullup resistor.

    The circuit to access a 1-Wire chip from an Arduino is trivial - just a 2K pullup resistor.

    Touching the ground wire to an outer ground pin of the Magsafe connector and the data wire to the inner adapter sense pin will let the Arduino immediately read and display the 64-bit ID number. The charger does not need to be plugged in to the wall - and in fact I recommend not plugging it in - since one interesting feature of the 1-Wire protocol is the device can power itself parasitically off the data wire, without a separate power source.

    The 64-bit ID can be read out of a Magsafe connector by probing the outer pin with ground, and the middle pin with the 1-Wire data line.

    The 64-bit ID can be read out of a Magsafe connector by probing the outer pin with ground, and the middle pin with the 1-Wire data line.

    To make things more convenient, the serial number can be displayed on an LCD display. The circuit looks complicated, but it's just a tangle of wires connecting the LCD display. Using a simple program, the 64-bit ID number is displayed on the bottom line of the display. The top line is a legend indicating the components of the code: "cc" CRC check, "id." customer id, "ww" wattage, "r" revision, "serial" serial number, and "ff" family. The number below corresponds to an 85 watt charger (55 hex = 85 decimal).

    A 1-Wire ID reader with LCD display. Touching the wires to the contacts of the Magsafe connector displays the ID code on the bottom line of the display. The top line indicates the components of the code: CRC check, customer id, wattage, revision, serial number, and family.

    A 1-Wire ID reader with LCD display. Touching the wires to the contacts of the Magsafe connector displays the ID code on the bottom line of the display. The top line indicates the components of the code: CRC check, customer id, wattage, revision, serial number, and family.

    Controlling the Magsafe status light

    The Mac controls the status light in the Magsafe connector by sending commands through the adapter sense pin to the 1-Wire DS2413 switch IC to turn the two pairs of LEDs on or off. By sending the appropriate commands to the IC through the adapter sense pin, an Arduino can control the LEDs as desired.

    The picture below demonstrates the setup. The same simple resistor circuit as before is used to communicate with the chip, along with a simple Arduino program that sends commands via the 1-Wire protocol. These commands are described in the DS2413 datasheet but should be obvious from the program code.

    I used a cable removed from a dead charger for simplicity. The LEDs are normally powered by the charger's voltage, which I simulated with two 9-volt batteries. To hook the Arduino to the connector, this time I used a Mac DC input board that I got on eBay; this is the board in a Mac that the Magsafe connector plugs into. The only purpose of the board here is to give me a safer way to attach the wires than poking at the pins.

    The connector contains a pair of orange/red LEDs and a pair of green LEDs, which can be switched on and off independently. When both pairs are lit, the resulting color is yellow. Thus, the connector can display three colors. The Arduino program cycles through the three colors and off, as you can see from the pictures above.

    The charger startup process

    When the Magsafe connector is plugged into a Mac, a lot more happens than you might expect. I believe the following steps take place:
    1. The charger provides a very low current (about 100 µA) 6 volt signal on the power pins (3 volts for Magsafe 2).
    2. When the Magsafe connector is plugged into the Mac, the Mac applies a resistive load (e.g. 39.41KΩ), pulling the power input low to about 1.7 volts.
    3. The charger detects the power input has been pulled low, but not too low. (A short or a significant load will not enable the charger.) After exactly one second, the charger switches to full voltage (14.85 to 20 volts depending on model and wattage). There's a 16-bit microprocessor inside the charger to control this and other charger functions.
    4. The Mac detects the full voltage on the power input and reads the charger ID using the 1-Wire protocol.
    5. If the Mac is happy with the charger ID, it switches the power input to the internal power conversion circuit and starts using the input power. The Mac switches on the appropriate LED on the connector using the 1-Wire protocol.

    This process explains why there is a delay of a second after you connect the charger before the light turns on and the computer indicates the battery is charging. It also explains why if you measure the charger output with a voltmeter, you don't find much voltage.

    The complex sequence of steps provides more safety than a typical charger. Because the charger is providing extremeley low current at first, there is less risk of shorting something out while attaching the connector. Since the charger waits a full second before powering up, the Magsafe connector is likely to be firmly attached by the time full power is applied. The safety feature are not foolproof, though, as the burnt-up connector I tore apart shows.

    Don't try this at home

    Warning: I recommend you don't try any of these experiments. 85 watts is enough to do lots of damage: blow out your Mac's DC input board, send flames out of a component, blow fuses, or vaporize PC traces, and that's just the things I've had happen to me. The Mac and charger both have various protection mechanisms, but they won't take care of everything. Poking at your charger while it's plugged in is a high-risk activity.

    Reading your charger's ID by probing the pins while it's not plugged in is considerably safer, but I can't guarantee it. If you mess up your charger, computer or Arduino you're on your own.

    Conclusions

    There's more to the Magsafe charger connector than you might expect. The center pin of the connector - the adapter sense pin - controls a tiny chip that both identifies the charger and controls the status LED. It is part of a complex interaction between the charger and the Mac. Using an Arduino microcontroller, this chip can be accessed and controlled using the 1-Wire protocol. Is this useful? Not really, but hopefully you found it interesting.

    Tenma 72-7740 multimeter: review and teardown

    The Tenma 72-7740 digital multimeter is a multimeter in the $70 price range. Overall, it's a nice, solidly-build meter and it has performed well for me. I received this DMM from Newark element14 for review; in this article I describe its functionality followed by a teardown.

    What you get

    What comes in the box with the Tenma 72-7740 DMM: temperature probe, battery, alligator clips, and probes.

    The DMM comes with a temperature probe, battery, alligator clips, and test probes. Note that the test probes have very short metal tips, unlike the long tips on most probes. The alligator clip probes are a nice addition. My biggest complaint with the DMM is the temperature probes connections are soldered with no strain relief so I worry the wires will break off.

    The DMM also comes with a pocket-sized 36 page operating manual - a real, physical manual on paper, not a PDF file like most products these days. The DMM doesn't really need a manual - functions work pretty much as you'd expect - but it's nice to have the manual.

    Specifications

    The DMM is autoranging with maximum reading of 3999. It is full-size (177mm × 85mm × 40mm), not a pocket DMM, and has a built-in stand. The LCD display is large and clear and has a backlight, which is nice if I ever end up using the meter in the dark. It has 10MΩ input impedance and maximum voltages of 1000V DC and 750V AC. The top current range is 10A.

    The DMM also includes capacitance, diode, temperature, frequency, and duty cycle measurements. The top capacitance range (100µF) can take up to 15 seconds to get a measurement, so be patient with those big electrolytics. The lowest capacitance range is 40 nF with 10pF resolution claimed. The DMM also has a continuity buzzer, although I find the sound crackles a bit. The temperature readings are only in °C; I know using Fahrenheit makes me a bad person, but that's what I need to check my appliances. The temperature range is -40°C to 1000°C. The upper range is hotter than I need, but since I sometimes go outside below -40°C my multimeter should be able to handle it too.

    Buttons provide hold and relative mode. The meter goes into sleep mode after 30 minutes.

    I don't have the equipment to measure the accuracy of the DMM myself, so I'm going off the published values. The specification for DC voltage accuracy is a reasonable ±0.8%; the considerably more expensive Fluke 177 has ±0.09% accuracy, so you get what you pay for.

    The function knob has 7 positions: V, resistance/capacitance/diode/continuity, Hertz, °C, µA, mA, and A. The blue function button switches between AC and DC or switches among resistance, capacitance, diode, and continuity.

    There are a few functions found in more advanced multimeters that aren't found here: min/max measurement, RS-232 support, °F, a 4nF capacitance scale, and an analog bar graph.

    For full specifications, see the specification chart.

    Tenma 72-7740 digital multimeter measuring 60Hz line frequency

    Tenma 72-7740 digital multimeter measuring 60Hz line frequency

    Teardown

    Of course I was interested in what was inside the multimeter and opened it up. The instruction manual describes how to remove the screws under the feet. The force required to pry the case apart made me a little nervous, but it snapped open without breaking anything. Note that the case must also be opened in this way to replace the fuses - they are not accessible from the battery compartment. Unfortunately I tend to blow fuses a lot measuring charger performance, but this may motivate me to be more careful.

    Inside the Tenma 72-7740 DMM, showing the foil shield, the two fuses, and the thick wire for high-current measurements.

    A foil shield covers most of the circuit board, with holes for some adjustments. Near the bottom is a thick wavy wire, which is the precision resistor used for the high-current measurements, a fraction of an ohm. There's nothing particularly interesting directly under the foil shield; almost all the components are on the other side.

    Removing the circuit board and flipping it over shows the circuitry. The large LCD display is at the top, with the pushbuttons below. The most visually striking part of the board is the round circuitry for the function knob, which I will explain in more detail below. To the left are three precision (blue) resistors for mA and µA measurement. Below are 5 diodes which I believe are for input protection. The large black cylinder in the lower right appears to be a spark gap to protect the input from high voltages - the DMM is rated to 1000V DC overload protection. Below it is a large yellow PTC resistor to protect from input overloads. The 8-pin IC is a STMicroelectronics TL062C low power J-FET dual op amp.

    The circuit board for the Tenma 72-7740 DMM.

    The circuit board for the Tenma 72-7740 DMM.
    Underneath the LCD is the 100-pin controller IC and a bunch of SMD components. The Semico CS7721CN chip powers the Tenma 72-7740 DMM. I wasn't expecting that a DMM chip would need 100 pins, but that seems to be common. I couldn't find a datasheet for this specific chip, but datasheets for other similar chips (such as the Fortune FS9721 and Cyrustek ES51982) give an idea of how digital multimeters works. The chip has signal inputs for the different functions (voltage, current, resistance, frequency, capacitance, etc.) The four blue precision resistors below the chip divide the input by powers of 10 as appropriate. Six mode pins are connected to the function selector switch to select the appropriate function, as will be displayed below. The function pushbuttons are also connected to the IC. About 17 pins from the IC drive the LCD segments. The crystal provides accurate timing, which is critical for the accuracy of the dual-slope analog-to-digital converter that measures the input.

    The 100-pin Semico CS7721CN chip powers the Tenma 72-7740 DMM.

    The 100-pin Semico CS7721CN chip powers the Tenma 72-7740 DMM.

    How the function selector switch works

    Rotary switches have always been mysterious to me. The pattern on the circuit board seems to be made up of random lines rather than any obvious switch contacts, and looks as much like an Aztec symbol as a switch. So I figured it was time to dive in and figure out how it works.

    The selector knob has 7 positions, rotating a bit under 180 degrees in total. Looking at the back of the selector knob, you can see six independent sliders for six separate switching circuits. Each slider has two peaks in the middle, which bridge two contacts on the circuit board. Note that the two outermost sliders are offset 90 degrees from the others. Since the knob turns a bit under 180°, the sliders n

    The function knob rotates through seven positions and has six independent contacts.

    The following diagram shows how the switches work. Each of the six colored semi-circular rings is associated with one of the sliders. The seven lines inside each semicircle indicate the seven possible positions of the associated slider. The most counterclockwise position in each ring is the V setting, followed by Ω, Hz, °C, µA, mA, and A. If there are two traces lined up with the slider, the slider will connect the two traces.

    This diagram shows the structure of the function switch on the Tenma 72-7740. Each color shows one of the six independent switches, with lines for the seven possible positions. In highlighted positions, a pair of contacts is closed.

    One surprise is that many of the traces don't actually form a circuit. The highlighted positions in the diagram are active positions that close two contacts, but the other positions don't form a connection. In particular, the red ring is only active in one position, and the blue ring in two positions. Many positions have the same circuit trace on both ends of the line, which means the switch does nothing and the trace is unnecessary. My guess is that the redundant metal is there because metal-on-metal is lower friction than metal-on-circuit-board.

    The white, cyan, and blue rings ground various combinations of "mode" pins on the IC to select the function. The left half of the purple ring directs the µAmA°C input to the appropriate circuit based on the function. The right half of the purple ring directs the HzVΩ input appropriately. The red ring has a connection only for the °C setting. The orange ring makes connections for Ω, °C, and A.

    Conclusion

    The 72-7740 DMM is a solid meter that gets the job done and I have only minor complaints. It currently sells for about $70. Inexplicably, the next model up, the 7745, is cheaper despite having true RMS and a serial RS-232 output. The model down, the 7735 is a good deal at about half the price; it also has RS-232, although it lacks temperature measurement, the backlight, and sleep mode.

    The Tenma 72-7740 DMM in the box.

    The Tenma 72-7740 DMM in the box.

    Thanks to Newark element14 for giving me this digital multimeter free for review. (Newark element14 consists of the merger of the well-known Newark electronics distributor and the element14 online electronics community into a single global brand.)