What's inside a counterfeit Macbook charger? After my Macbook charger teardown, a reader sent me a charger he suspected was counterfeit. From the outside, this charger is almost a perfect match for an Apple charger, but disassembling the charger shows that it is very different on the inside. It has a much simpler design that lacks quality features of the genuine charger, and has major safety defects.
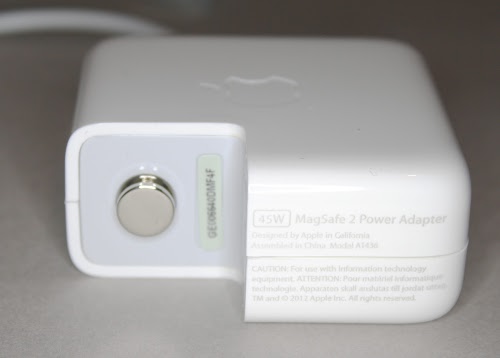
The counterfeit Apple chargers I've seen in the past have usually had external flaws that give them away, but this charger could have fooled me. The exterior text on this charger was correct, no "Designed by Abble" or "Designed by California". It had a metal ground pin, which fakes often exclude. It had the embossed Apple logo on the case. The charger isn't suspiciously lightweight. Since I've written about these errors in fake chargers before, I half wonder if the builders learned from my previous articles. One minor flaw is the serial number sticker (to the right of the ground pin) was a bit crooked and not stuck on well.
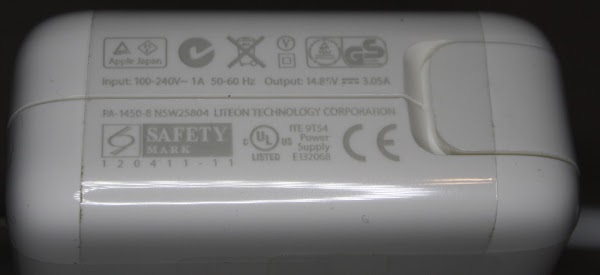
The photo below shows the safety certifications that the charger claims to have. Again, it looks genuine, with no typos or ugly fonts.
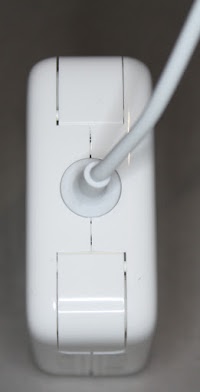
One flaw that made the original purchaser suspicious was the quality of the case didn't seem up to Apple standards. It didn't feel quite like his old charger when tapped, and the joints appear slightly asymmetrical, as you can see in the picture below.
A problem showed up when I plugged in the charger and measured the output at the Magsafe connector. I measured 14.75 volts output and got a spark when I shorted the pins. Since the charger is rated at 14.85 volts, this may seem normal, but the behavior of a real charger is different. A Magsafe charger initially produces a low-current output of 3 to 6 volts, so shorting the output should not produce a spark. Only when a microcontroller inside the charger detects that the charger is connected to a laptop does the charger switch to the full output power. (Details are in my Magsafe connector teardown article.) This is a safety feature of the real charger that reduces the risk from a short circuit across the pins. The counterfeit charger, on the other hand, omits the microcontroller circuit and simply outputs the full voltage at all times. This raises the risk of burning out your laptop if you plug the connector in crooked or metallic debris sticks to the magnet.
Inside the charger
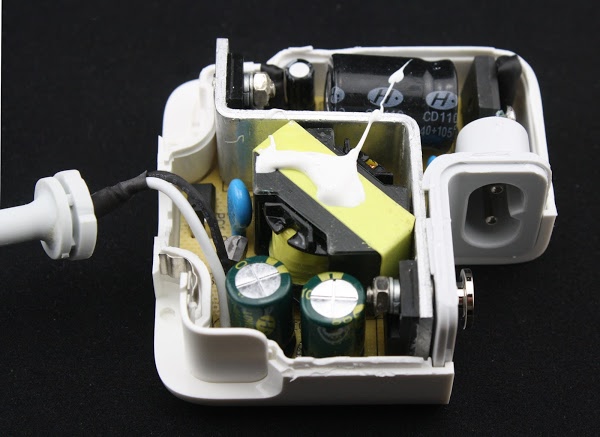
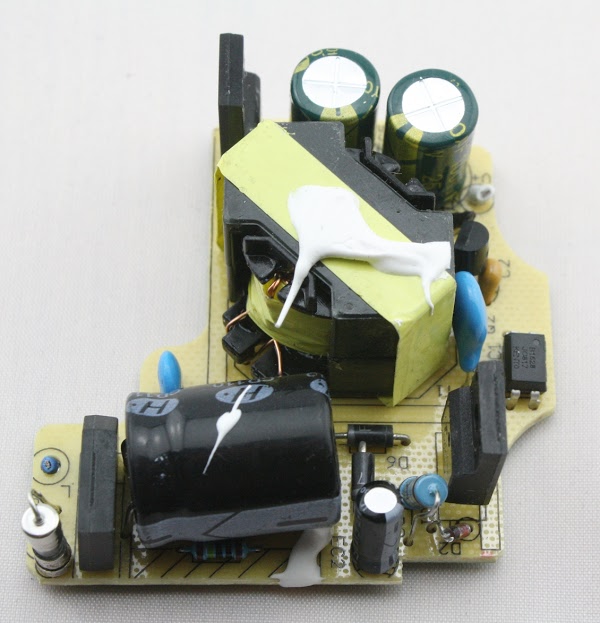
Cracking the charger open with a chisel reveals the internal circuitry. A real Apple charger is packed full of complex circuitry, while this charger had a fairly low density board that implemented a simple flyback switching power supply.
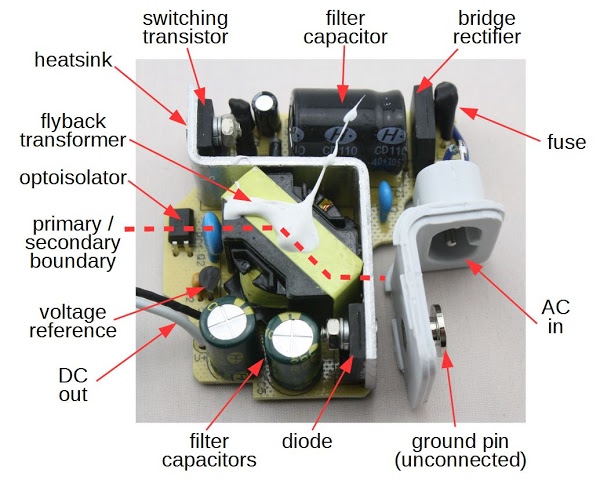
The circuit is a fairly standard flyback power supply. To understand how it works, look at the diagram below, going counterclockwise from the AC input on the right. After going through a fuse, the power is converted to DC by a bridge rectifier. The large filter capacitor smooths out the DC. Next, the switching transistor chops the DC into pulses, which are fed into the flyback transformer. The transformer's low-voltage output is converted back to DC by the output diode. The output filter capacitors smooth the DC output.
A TL431A voltage reference generates a feedback signal from the output, which is fed to the control IC through the optoisolator. While this circuit may seem complex, it's pretty standard for a simple charger. A genuine Macbook charger on the other hand has a much more complex circuit, as I describe in my teardown.
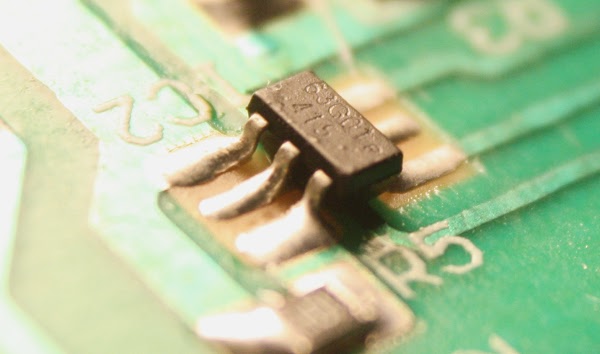
The charger is controlled by a tiny 6-pin IC on the underside of the board. It switches the MOSFET on and off at the proper rate (about 60 kilohertz) to generate the desired output voltage. The control IC is labeled "63G01 415", but I couldn't find any chip that matches that description. (Update: a clever reader identified the chip as the OB2263.)
What's wrong with this charger
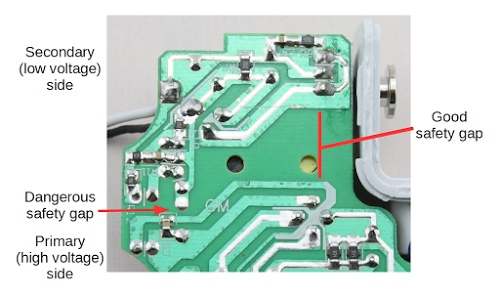
The most important feature of a charger is the isolation between the potentially-dangerous AC input and the low-voltage output. High voltage and low voltage should be separated by a safety gap of at least 4mm (to simplify the UL's creepage and clearance rules). On the circuit board below, the high voltage input section is at the bottom and the low voltage output section is at the top. On the right half of the board, the two sections are separated by a large gap, which is good. On the left, there should be a gap (bridged by the optoisolator). Unfortunately, traces and components pass through this area making the gap dangerously small, under 1 mm. Any moisture or loose solder could bridge this gap sending high voltage to the output.
I'm puzzled as to why counterfeit chargers never manage to have sufficient clearance distances. They use simple, low-complexity circuits so the circuit board layout should be straightforward. Except in the smallest cube phone chargers, they aren't fighting for every millimeter of space. It shouldn't take much additional effort to make the boards safer.
The second safety flaw is the heat sink that provides cooling for the input-side MOSFET and the output-side diode. The heat sink is basically a giant conductor between the two sides of the circuit, with only small gaps separating it from active parts of the circuit.
As well as having large creepage and clearance distances between high and low voltages, genuine chargers also make extensive use of insulating tape for separation. The counterfeit charger lacks extra insulation, except heat-shrink tubing around the fuse and fusible resistor. I didn't disassemble the transformer, but I expect it also lacks the necessary insulation.
The counterfeit charger has a metal ground pin (unlike other fakes I've seen that have a plastic pin). However, the pin is just for appearance and is not connected to anything.
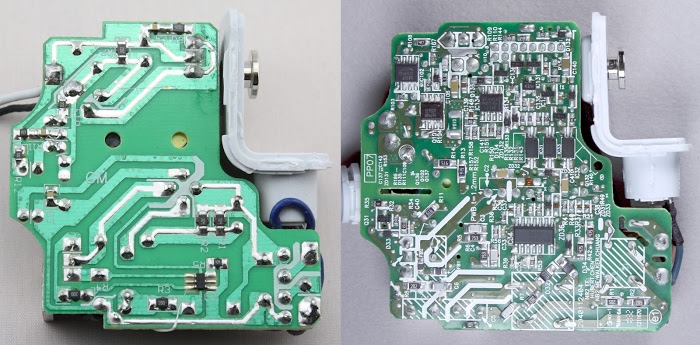
The photo below compares the underside of the counterfeit 45W charger (left) with a genuine Apple 60W charger (right). As you can see, the counterfeit has a simple circuit board with just a few parts, while the genuine charger is crammed full of parts. The two boards are in totally different worlds of design complexity. The additional parts provide better power quality and improved safety in the real charger; this is part of the reason genuine chargers are significantly more expensive.
Quality of the power
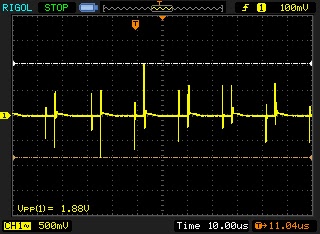
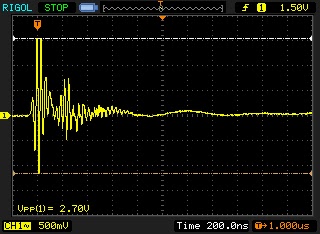
I measured the output power from the counterfeit charger with an oscilloscope, while drawing 15 watts. As you can see below, the output power is not smooth, but has pairs of large spikes when the switching transistor turns on and off. The charger operates at a frequency of about 60 kilohertz. More filtering inside the charger reduces these voltage spikes, but would cost more.
Conclusion
This counterfeit Magsafe charger is convincing from the outside, with more attention to detail than most. Until I opened it up, I wasn't completely sure that it was counterfeit. But on the inside, the difference between the counterfeit and real chargers is clear. The counterfeit has a much simpler circuit that provides poorer-quality power. It also ignores safety requirements with less than a millimeter separating you and your computer from a dangerous shock. While counterfeit chargers are much cheaper, they are also dangerous to you and your computer. Thanks to Richard S. for providing the charger.I've written a bunch of articles before about chargers, so if this article seems familiar, you're probably thinking of an earlier article, such as: Magsafe charger teardown, iPhone charger teardown or iPad charger teardown.
You can follow me on Twitter and find out about my new articles.
